Showing posts with label Recipes. Show all posts

Friday, August 9, 2019

Lemon Zucchini Bread

Did I mention that we have a goodly amount of zucchini at our disposal? We're not in the "we're completely drowning in zucchini" phase. Thank goodness. In fact, I'd say we have just enough both for baking and as a side to whatever it is we are currently eating.

This is my other favorite thing to do with zucchini--lemon zucchini bread. YUM! Once again, this is not my recipe. Find it here!

What makes this recipe so great is that it's perfectly moist and stays that way even after a few days. You can thank the yogurt for that. I go for the vanilla flavored one, but you could opt for the lemon flavored if that suits your fancy. You can do it with out without the glaze. I opted out of the glaze this time around but that's mostly because I started baking too late, and then my baby needed me, and then it was bedtime. It just didn't happen. But it's still delicious! The glaze gives it a little extra punch of that lemon flavor,
so if your a lemon enthusiast, you may want to make time to get that glaze on there.

I did mini loaves again. I'm a mini loaf fan. It's great if you want to give someone a little treat without giving them a full loaf. It's also more convenient for my husband to run off with have a loaf as he's heading out the door for work. Also it doesn't take as long to bake which can definitely come in handy sometimes.

So give it a try and tell me what you think! Are you more of a chocolate zucchini bread fan or a lemon zucchini bread fan? If we ever had an in person book club meeting, I would make your three loaves--chocolate, lemon, and plain ol' classic zucchini bread. All are delicious! And those are the only three variations I know! I'm sure there are more out there. Do you have a secret family zucchini bread recipe that's to die for?

Happy baking!

Tuesday, August 6, 2019

Double Chocolate Zucchini Bread


Hey guys! How's the reading going? How's the baking going? How's the combo going? Nothing's better than eating a delectable baked good while curling up to a good book...until you get crumbs and or melted chocolate on the pages. It's probably worth the risk though.

I've been getting some good baking in, so it's time for another recipe post! Huzzah!

I don't know about you, but there always seems to be a surplus of zucchini in the summer time. We aren't even the ones growing it! But when you live close to the in-laws who are growing it, you inherit a bunch of the green squash (I'm totally not complaining by the way). There are a few different ways to savor the vegetable, but with my baking tendencies I must say my favorite is bread form. I have a few different variations up my sleeve. This double chocolate version is definitely a favorite. I mean, it's double chocolate. What else is there to say?

This recipe come from another blog, so I'm actually going to redirect you over there. Click here!

This recipe is so good! My husband and I both said it's like eating a Costco chocolate muffin, but you can feel a little better about it because it has a vegetable in it, right? RIGHT?! Plus when I've seen copycat recipes for Costco muffins it basically says, "Buy a cake mix." This has to be a little better than that. Or so I'm telling myself.

I made this recipe in a mini loaf pan. It takes at least 30 minutes that way. Often I start with 20 minutes and then go from there because I had a streak of overcooking banana bread when I tried to do it in mini loaf or muffin form. Better to start out smaller than to cook it for too long.

Since it is chocolate it can be a little harder to tell when it's done. When it doubt, poke it with a toothpick or cake tester and if it comes out clean it's done! Give it some time for cooling and enjoy! Your taste buds will thank you.

As for reading, I'm currently reading Endling by Katherine Applegate. Pick up a copy and follow along!

Tuesday, July 2, 2019

Orange Scones

I have been wanting to write a post for FOREVER! Apparently I haven't figured out how to juggle reading, baking, and blogging along with the other things I have to do, like caring for a three month old (which I love). But hey! I still plan on stopping by here when I get the chance, and I still do fit in some baking and reading. Mostly I've been reading children's picture books. I've found some real gems by the way.

But today is a baking post sort of day! If you were to come visit me this week for a live, in-person book club, I would probably make these for you, or possibly something patriotic given the upcoming holiday. These are delicious though, and really aren't that difficult to make.

So, I always hate it when I want to get to a recipe on a blog but people always chat forever about it when I just want to see the recipe so I can eat it. Even so, I'm going to make you read a little bit more before I give you the recipe.

Has anyone else referred to fry bread or know people who refer to fry bread as scones? Well, those aren't the scones I'm talking about (although, those are quite tasty with a bit of homemade jam, cinnamon and sugar, or honey butter). My husband has grown up calling those scones, and I had heard that too, but I also knew scones as a delicious baked treat that I can get at Panera Bread or at a fair not too far from where I grew up. Because of this, there's been some confusion in our house when it comes to the mention of scones. My husband is usually thinking of deep fried goodness while I'm thinking of baked heaven. I decided to do some research because especially now that I can hold Google in the palm of my hand I like to learn anything and everything that has to do with random facts about, well, pretty much anything.

Here's what I found out:
Referring to fry bread as a scone is a regional thing, particularly to Utah, and it seems that no one knows why people started referring to deep fried dough as a scone. It appears that the baked scone has much older roots. Apparently, the deep fried versions are also known as Utah Scones or Pioneer Scones. My research is basically wrapped up in this one article from the Salt Lake Tribune.

Okay, know that I've shared my random collection of knowledge with you, let's get to the baking! I should note that this is actually a mashup of two recipes. Here's what I came up with:


Ingredients:

2 cups all purpose flour
1/2 cup granulated sugar
2 and 1/2 tsp baking powder
1/2 tsp salt
1/2 cup unsalted butter, frozen
Zest of 2 medium oranges
1/2 cup heavy cream
1 large egg
1 tsp vanilla

For the glaze:
3 tbsp unsalted butter, melted
1 cup powdered sugar
1/2 tsp vanilla
2 tbsp freshly squeezed orange juice

Preheat oven to 400 degrees.

In a large bowl whisk the flour, sugar, baking powder, and salt. *Grate the Frozen butter. Toss the grated butter into the flour mixture and combined with a pastry cutter, your fingers, or two knives until the mixture resembles course meal. Stir in orange zest.

In a small bowl whisk the cream, egg, and vanilla together. Drizzle the wet ingredients over the flour mixture and then toss the mixture together with a rubber spatula (I use a spoon and my hands a little) until everything appears moistened. Try your best to not overwork the dough. Sometimes, I add a tiny bit more cream to get it all to stick together, but be careful not to add too much as you don't want your dough to get too wet.


Work the dough into a ball with flowered hands and transfer to a baking sheet with parchment paper. Press into a 8 in disc and cut into 8 equal wedges with a very sharp knife.

Bake for 20 minutes. Remove from the oven and using a sharp knife separate the scones so there is a little more space between each one. Bake for 5 more minutes or until lightly brown on the top and edges. If you don't separate them before that second back, the insides of your scones won't cook all the way through. I've noticed with my oven that I sometimes have to cover the scones with aluminum foil to prevent the outsides from burning while the insides finish cooking.

Mix all the ingredients for the glaze together in a small bowl. With a spoon, add as much or as little glaze as desired. The glaze will firm up as it dries on top of the scone. For best results, let the scones cool a little before adding the glaze.

*Note: I don't always use frozen butter. Sometimes I cut up refrigerated butter into small cubes and then put it in with the flour using either a pastry cutter or two knives to sort of cut through the mixture. The danger is having your butter melt too quickly. As we're getting into warmer days, I thought I was going to have an issue with it melting. I made it once grating frozen butter and once my cubed way and both turned out fine. If you're worried about it, I'd say go the frozen butter way.

There you have it! I hope you enjoy these as much as I do. And now I must leave you as I do believe I hear a little one who has decided nap time is over. Fare thee well follow readers and bakers!

Thursday, February 14, 2019

Valentines, Excuses, and Chocolate Mousse

Ready for my confession? I'm sure you may have a guess as to what it may be. I mean, have you seen how long it's been since I wrote a post? I really shouldn't shower you with excuses when this happens, but I'm going to anyway.

I haven't read a single page of a book since that last post. Okay, that's not entirely true. The other night I couldn't sleep so I started reading a book about the making of Fantastic Beasts and Where to Find Them. I definitely read more than one page. And I've read recipes while preparing dinner in the evening, so it's not like I haven't been doing any reading at all 😆

The fact of the matter is this: I have a big life changing event coming up in a few weeks, and my mind has been a bit preoccupied with that. Not to mention I've gotten sucked into watching the original Twilight Zone with my husband in the evenings. My last excuse/distraction was the release of Kingdom Hearts III. I'm not just a book lover. I enjoy a good video game now and again. I finally started playing the new game yesterday even though I've had it since it was released in the end of January partly because I've been trying to get things ready for aforementioned life changing event and also because I was trying to play through (most of) the previous games and I was stuck on the last one. Finally, I got fed up, watched the final scenes on YouTube, and began the new game. (For the record, I have beaten that game in the past. I'm not a complete cheater. Ha!) Kingdom Hearts has it's own rich (if not sometimes convoluted) story line, so my need for a good story is still being met!

Basically, I have no particular book to talk to you about today, so instead, I'm going to share a treat with you that I tried the other day! It's not technically a baked good...but hey, I would still give it to you if you came to my house for an official book club meeting.

This was my first attempt ever making a chocolate mousse. From what I can see from other recipes online, this is quite a simple version. It's quick and easy and doesn't involve eggs like the other recipes I peeked at. The whole reason why I gave this a go is because I had made a dinner using heavy whipping cream, and I always have cream leftover. I really didn't want it to get wasted, so I googled things to do with whipping cream--you know, besides making whipped cream...


This called for four ingredients, which I already had, and it's done in a few minutes. The recipe can be found here.

The ingredients you will need are:
Heavy Whipping Cream
Unsweetened Cocoa Powder
Powdered Sugar
Pinch of Salt

She made this by shaking it all together in a mason jar. I mixed it up in the kitchen aid, and that did the trick. I might play with the cocoa to sugar ratio as it was a little bit more bitter than I wanted it to be. Or perhaps I'll just drown it in more whipped cream! Either way, this is something I would do again, and it's a nice quick, easy treat.

So, if you haven't thought of some Valentine's Day treat yet, perhaps you should give this one a go! Happy Valentine's Day to all of you! I hope it's a good one filled with great people (or perhaps a fur baby who will be more than willing to give you all the loves).

Until next time!

Friday, September 28, 2018

Fall, Hobbits, and Lembas Bread

It has been far too long since I have done a baking post! Time to fix that.

In case you haven't noticed, it's Fall! Everyone knows that Fall is the perfect time for baking (so is Winter, Spring, and Summer for that matter). It's also a perfect time to remember our dear friends Frodo and Bilbo Baggins. Last weekend was Hobbit day. If you think I'm making that up, I'm not. In honor of that and baking, I'm going to share with you a not so secret recipe passed down by elves for millennia. It's the recipe for lembas bread--that stuff that can fill a grown man after one bite, but not a hungry hobbit apparently.

Related image


I've seen this recipe multiple places around the internet, so I don't feel bad sharing it. I honestly don't even know what the original source was! However, I have made it a few times, and I rather enjoy it. It's probably not very authentic, especially since I like to sneak a dab of whipped cream for the perfect finishing touch. Just don't tell the elves.

It's very much like making scones, and the texture is similar also. One bite is definitely not enough to fill a grown man's stomach, but it's tasty!


Lembas Bread


Ingredients:
 2 ½ cups of flour
1 tablespoon of baking powder
¼ teaspoon of salt
½ cup of butter
1/3 cup of brown sugar
1 teaspoon of cinnamon
½ teaspoon honey
2/3 cup of heavy whipping cream
½ teaspoon of vanilla

Directions:

1. Preheat oven to 425F. Mix the flour, baking powder and salt into a large bowl. Add the butter and mix with a well till fine granules (easiest way is with an electric mixer). Then add the sugar and cinnamon, and mix them thoroughly.

2. Finally add the cream, honey, and vanilla and stir them in with a fork until a nice, thick dough forms.

3. Roll the dough out about ½ in thickness. Cut out 3-inch squares and transfer the dough to a cookie sheet.Criss-cross each square from corner-to-corner with a knife, lightly (not cutting through the dough).

4. Bake for about 12 minutes or more (depending on the thickness of the bread) until it is set and lightly golden.

Ignore this one's strange deformity.
***Let cool completely before eating, this bread tastes better room temperature and dry. Also for more flavor you can add more cinnamon or other spices***

I think the only thing that could have made these more complete is if I had wrapped them all fancy like in some leaves. And then perhaps I could have taken them on a long journey to new lands, never knowing if I'll ever return... Or I could just eat them.

Thanks for sharing some of your Fall treats with me on Facebook! I'm dying to make some pumpkin sheet cake, which I actually haven't done in many years. If you take a stab at making lembas bread, let me know. Share pictures even! I can't be the only one partaking in baking fun.

Happy Belated Hobbit Day!

Tuesday, June 12, 2018

Snickerdoodles


I am a self-proclaimed snickerdoodle snob. That is of utmost importance to this story. My husband knows of my snobbery. When he asked me to bake cookies on Friday, I assumed he’d want chocolate chip cookies as that has been our go to. He surprised me by requesting snickerdoodles. Here’s the thing, I may be a snickerdoodle snob, but I had never actually made them until that day.

I started out with a sense of dread. Being the snickerdoodle snob that I am, how could I possible pull off my very own snickerdoodle and be proud of it? I told Corey of my concerns and he proclaimed, “How can you not like your own cookies? That’s like not liking your own child!”

With those sentiments, I set to work. I knew of a recipe that I’d eaten and enjoyed, so I used that to guide me on my baking journey. And let me tell you, that’s got to be my favorite snickerdoodle recipe! I’ve now learned after making these cookies and my previous attempts at chocolate chip cookies in my oven versus my mother-in-laws oven that my oven likes to make my cookies flat. Apparently I’m still getting used to my oven, and after some research, it’s possible that it’s actually a little too hot for my poor cookies. Nevertheless, with some experimentation, I did get some that weren’t so flat, and even the flat ones had the taste and texture I look for in a snickerdoodle cookie.

The reason why I’m a snickerdoodle snob is that too often I get a hard, crunchy cookie. I don’t want a snap or a biscuit when I eat a snickerdoodle—I want a soft cookie with the perfect blend of cinnamon and sugar. So I think I did pretty good for my first try, and even though my oven flattened my cookies, I think the recipe I used is a pretty darn good snickerdoodle recipe!

The recipe itself comes from Six Sisters’ Stuff, and was inspired by the snickerdoodles at Disneyland. So hope on over there, and do yourself a favor by making the best snickerdoodles ever.


Is anyone else a self-proclaimed cookie snob of some sort? Do you have a go to snickerdoodle recipe that you would say is the best ever?

Also, I’m totally a wedding cake snob. Just throwing that out there. This weekend was my anniversary (the very first!), so we pulled out a bit of our wedding cake we’ve been saving in the freezer for that precise moment, and it was still so good! Wedding cake should be delicious as well as beautiful.

And with that, I’ll bid you adieu until next time!

Friday, May 4, 2018

Star Wars Sugar Cookies

Hello all my fellow book nerds! Today is a very special day for Star Wars lovers. It's May the fourth! As far as I am concerned, there's only one good way to celebrate such a glorious occasion! Baked goods!

The last treat I did for May the fourth was Chewbacca doughnuts, which really was as simple as buying some doughnuts and drawing on them with icing. It was a lovely treat. Since then, I have acquired Star Wars cookie cutters, and I love them! This is only my second time using them, and I decided to have a little fun buy making some green dough especially for Yoda.

If you would like to create your very own Star Wars sugar cookies, you can get the cookie cutters here and here. We opted not to frost them because we like them plain (and I have no faith in my level of cookie decorating skills), but the recipe I used also has a frosting recipe.

The recipe I used can be found here. I halved the recipe as it makes a ton of cookies, and I don't have enough mouths around to help me eat them. Here's what I did:

Star Wars Sugar Cookies


Ingredients:

1 1/2 sticks of butter
1 cup granulated sugar
2 eggs
1 teaspoon vanilla
2 1/2 cups of flour
1 teaspoon baking powder
1/2 teaspoon salt

Directions:

1. In the bowl of mixer fitted with the paddle attachment, cream together butter and sugar. Mix in eggs and vanilla until well-combined.

2. Combine the remaining ingredients in a separate bowl before mixing with the wet ingredients until combined.

3. Chill in the fridge for 2 hours.

4. Preheat the oven to 400 degrees.

5. Roll out your dough on a lightly floured surface and cut out your shapes.

6. Bake on an ungreased cookie sheet for 6-8 minutes. Watch closely! You don't want to overcook them! There will be a hint of golden brown on the bottom edges.

You can choose to frost them if you wish! Like I said, I opted not to. You can also use food coloring to your advantage like I did with Yoda this time around.

There you have it! It's pretty simple and straight forward! Nothing makes a sugar cookie better than it being in the shape of one of your favorite characters!

May the force be with you! And if you haven't already, you should pick up a Star Wars book! There's many to choose from. Even if you don't want to delve into Star Wars Legends or any of the more current novels, there are comics, cookbooks, a handbook on speaking Wookie--in short, there's something for everyone! I highly recommend Darth Vader and Son and all the other Darth Vader books by Jeffrey Brown!

How did you guys celebrate May the fourth? If you forgot to celebrate, you can come hang out with me and help me eat the rest of these cookies :)

Friday, March 9, 2018

My Most Absolute Favorite White Bread Ever

Guys, I'm super thrilled right now for a couple of reasons.

Reason 1: I just got a proof copy of the second book in the Sheer Power series!

For those of you who don't know what a proof copy is, basically it's like a preview copy of a book coming out soon. It's not necessarily the final draft as there may be a few minor things that need to be fixed before the actual publication date (thing grammatical errors that drive you nuts when a publisher, editor, whoever didn't catch the mistake before the book went to the presses). It's a tool used by publishers so they can send these preview copies to bloggers and such who then can start getting the word out about the book (hopefully they have a good word to say!). By the time the actual publication date comes, hopefully a nice group of people have actually heard about your book.

Basically, I'm super excited because I'm feeling all sorts of book blogger official. That and I'm kind of honored that Vye Brante would send me a copy of her book. I feel like there's some trust going on there. No pressure for me :) Thanks, Vye, for the opportunity!

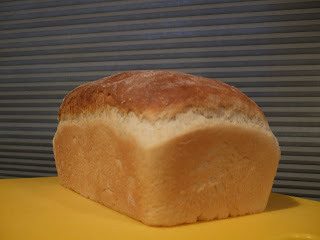
The result of my first time using a bread machine.
 It's sunken in the middle because it rose to much,
but man, it is still divine!
Reason 2: I have homemade white bread sitting on my kitchen counter.

I haven't really taken advantage of the recipes aspect that I wanted to bring to the book club thus far. I have been keeping some notes of foods mentioned in the books I read, but I haven't gotten around to trying them and transferring that experience to the blog. I wanted mainly to focus on foods from the books, but then I realized that tons of book clubs have refreshments of all sorts. I don't need to limit myself! So, I will probably separate those two categories in the recipe section. But enough about that. Let's talk bread!

I love bread. If I could live off that alone, I probably would...that and pizza and pasta which are pretty much the same family. A few years back, I became friends with someone who had taken a bread making class, and this was one of the recipes she shared with me. It is now one of my favorite loaves of bread to make ever. Having received a bread machine for a gift, I finally decided to put the machine to the test this week, and what better recipe to try than my favorite white bread!

Before I go on, here's a little WARNING: If you do use this recipe in a bread maker, decrease the amount of yeast used. When you can watch it, you can make sure it doesn't over rise. Since I put it in the machine, all I could do was watch and go, "Yep, that's too big." The bread still turned out great and tasty. It just also turned out ugly because the top collapsed. In case you didn't know, that's what happens when you let your dough rise too much.

Basic White Bread
The loaf pan version


1 tbsp yeast*
¼ cup sugar
1 ½ cups warm water
¼ cup butter, melted**
2 tsp salt
3-4 cups flour

*Use less yeast if you are using a bread machine or it will over rise.
**The original recipe calls for melted shortening, but I don't believe in shortening. I'm a butter girl all the way! But if you prefer shortening, go for it!

Directions if You're Doing it by Hand

Mix together water, sugar, and yeast in small bowl. Set in warm place. When foamy, transfer to large bowl and add 2 cups of the flour, salt, and butter/shortening. Mix thoroughly. Add flour ½ cup at a time until dough is too stiff to stir with spoon. Turn dough out on floured counter and knead until dough forms a soft round ball. Put dough back into bowl and let rise in warm place until double in bulk. Shape dough into loaf and place in greased loaf pan to rise again*. Bake at 350 for 35 to 40 minutes. Bread should sound hollow when tapped with fingers.

*In my experience with this lovely loaf, you don't want it to rise above the top of your bread pan before you start baking it or you will run the risk of a sadly collapsed loaf of bread.

Directions if You're Using a Bread Machine

Put the warm water and melted better in your machine's loaf pan. Next, heap all the dry ingredients except the yeast on top (don't mix as you're machine with do that for you). Make a little well in the flour with your finger and pour the yeast into the well. You don't want the yeast to come in contact with the wet ingredients. Choose all the appropriate options on your machine and wait for the result!

I love this bread, and I absolutely love that I now have a bread machine. It's kind of nice to not have to think about my bread again for 3 hours. At the same time, there is something fun about doing it all by hand (if you've got the time!). I've also tried this recipe with wheat flour instead of white flour and it was still just as delicious!

Try out this bread. Tell me what you think. It's excellent with some homemade jam! If you were going to a physical book club, what sorts of treats would you bring (or wish that someone else would bring)? 

Tune in next time to talk about A Swiftly Tilting Planet!

Friday, July 28, 2017

German Apple Cake

Nom! Nom! Nom!


One of the things I've really wanted to do with this book club/blog is to try foods that are mentioned in the books! That's what I call making reading interactive...and delicious!


There was actually a lot of different foods mentioned in Shannon Hale's The Goose Girl. I kept a list
as a read. Some things sounded much more delicious than other things. As delicious as bean and lard stew sounds, I decided to go with something else for my culinary experiment.

There was one food mentioned twice, and that was apple cake.

Seeing as the book is based off of a German fairy tale, I went in search of German apple cakes. There are many varieties, and I may try another one at some point just to compare. I wanted something more on the authentic side, and since the recipe sharer said her German mother used to make the recipe, I'm thinking I found a good option.

I followed the instructions almost exactly (I will elaborate in a moment). It ended up differently than I expected, but not in a bad way. Mostly just the texture and sweetness was different. Having been in Europe before and having desserts that are no where near as sweet as out desserts, I was surprised to find that this cake is indeed sweet. It's a bit firmer around the edges (although, that could just be because my timer mysteriously turned off, so I'm not actually sure how long I left it in the oven...not long enough to destroy it, and that's all that matters). The middle is soft and, I almost want to say, chewy. That with the apples and cinnamon make a pretty good combo.

My fellow destiny seekers lent a hand.
The Equipment:

The first thing you'll want to know is this lovely cake requires the use of a springform pan. The other equipment I used was a Kitchenaid mixer and one of these fancy schmancy apple corer, peeler, slicer machines of goodness. You may not actually want to use one of those fancy schmancy things and choose to do it by hand instead. Keep reading to find out why!

What I Did Differently:

This section seems to need bullet points! Make it so!


  • I didn't use Granny Smith apples. This was mostly because I already had gala apples, and I was perhaps too lazy to go and buy some Granny Smiths. That being said, it still worked, but I think the Granny Smiths would be a nice touch as they are more tart than gala apples and would therefore create a beautiful balance between tart and sweet. 
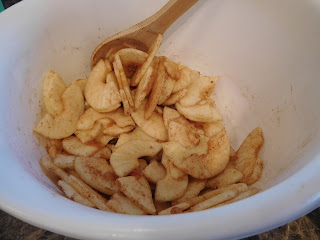
  • I used a fancy schmancy apple corer, peeler, slicer machine of goodness. The pro of this it that it takes care of all three steps in one! The con in this case is that you get very thin slices of apple. I ended up doubling up in layers of apple to make sure I had enough apple on there. If you compare my pictures with those in the original recipe you'll be able to see the difference. I think I may slice the apples by hand next time so I can get bigger chunks of apple.
  • I didn't use shortening to grease the pan. Sure it's a little thing, but hey, I'm kind of anti shortening. I never use it when recipes call for it, and so far the recipes have turned out great. What I did in this case was sprayed it with some Pam and then dusted it with the flour. You could just use butter instead, or if you're not anti shortening, feel free to use that.
  • I added a dollop of whipped cream to my piece. I couldn't resist.

Recipe Side Note:

Yes, I'm going to make you scroll all the way to the bottom to get to the recipe, but I want to make sure you read these notes for consideration before you actually get started. I've had to many times where I'm in the middle of the recipe and realize there were totally tips and tricks or important directions that I skipped over.

Here's your side note: this is a thick, sticky batter. You'll have to work it with a rubber spatula to
spread it evenly along the bottom of the pan. Also, it's not a very thick cake.

The Recipe:

Since I didn't change enough of this recipe to make it my own, just click here to be taken to the recipe.

Final Thoughts on the Recipe:

Judging by the fact that it disappeared withing a few days at my house, I'm taking it to mean that the recipe has earned a stamp of approval! I enjoyed the texture, and like I mentioned above, next time I'll make the apple slices bigger.

Now it's your turn! Make this cake for yourself and share pictures and impressions. Is there anything you would change about the recipe?